Posts

Showing posts with the label fireplace

NER CD Lever Frame Components

Image
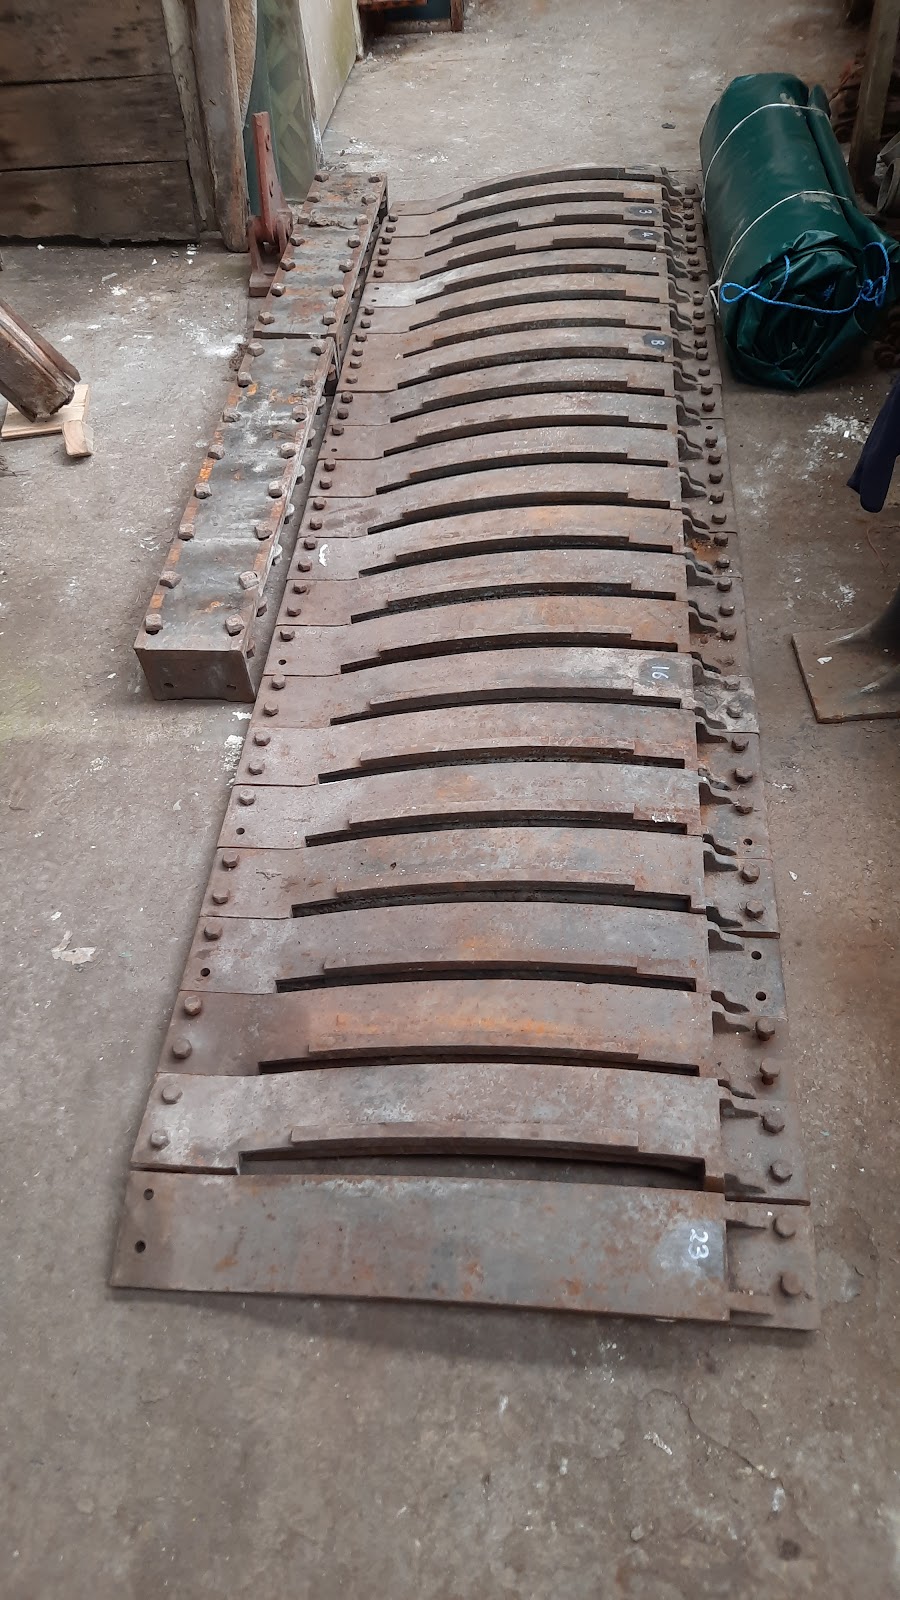
As the progress with the box itself nears the time at which we will be allowed to install the frame, we have been trying to get the various components cleaned up and painted. The stack of 22 levers with 3 of the catch blocks on top, showing their very distinctive shape. Some of the levers retain their original paint, whereas others were previously stripped back and primed in red oxide. The levers themselves required dismantling into their component parts so that they could be cleaned up properly, have the pins and holes inspected and made good as need be. As they have been dismantled, whilst the levers themselves have their number stamped on, the catch blocks and catch rods do not. Just in case they are not interchangeable (and to retain originality), we have numbered them accordingly. We did find that some levers have signs of brutality from some point in their lives: in some cases, the catch blocks would not slide off until the levers saw careful attention to high spots. The box cont...

Benches II - Sitting Around Idly?

Image
Following on from the previous instalment on benches, we had a discrepancy in height to tackle on the first bench along from the Junction ground frame. This was due to the bench top being a thicker sleeper than we had anticipated. Fortunately, we were only 1" out, so it was a quick case of marking up where the concrete legs touched the timber (allowing a bit of leeway), then flipping the timber over to cut out enough to allow the whole lot to sit lower. The alternative would have been to dig out the legs completely, then dig out even more underneath, before levelling them up again. We didn't fancy that in the slightest!! A battery circular saw was used to make multiple cuts across the timber, before the hammer and chisel were deployed to chisel out the excess timber. Once both sides were suitably rebated, the timber was flipped back over, levels checked and attempts made to push the threaded bar back through the holes. This was a bit fiddly, but accomplished the moment additio...

Going Potty!

Image
Last Tuesday saw the final bricks laid to complete the chimney stack of the signal box – I thought we would never get there, but we still need a pot. Those that we have are out of proportion with the stack, so we need a round terracotta pot approx. 24" high and approx. 10" outside diameter at the base in the style seen in the photograph below. If anyone has, or knows of one not in use, we would very much like to hear from you with a view to acquiring it. Moving on to the rear wall that has not been worked on for some months, we have brought the inside face up to ceiling height and are now busy building the sandstone outer face up to its final height. In addition, as you can see, some of the rafters have delighted in acquiring monumental twist since they were installed – something else to sort out!

Into the Daylight

Image
After what seemed like interminable messing about with the fireplace chimney breast and flue, we finally today brought the embryo stack into the daylight, puncturing the skyline for the first time in 60 odd years. Using our lovely special order, handmade bricks, we laid 6 courses of brick which was just enough to bring us up to the slate level. Handmade bricks made for very interesting brickwork because they are a variety of sizes with different lengths and thicknesses throughout the range, so Barry, Bernie & Andrew were kept really busy today sorting and trimming where necessary to enable me to build a neat stack. By 3 pm in this heat, we were tired and frazzled, so called it a day, keen to return and continue as soon as our batteries are recharged. I will keep you posted.

NER Central Division Lever Frame

Image
Just a quick update on the frame itself, which is going to be used in the S&D box. Inspection of the components revealed a crack in one of the stanchions (uprights that support the quadrants). This has now been delivered for a cast iron welding repair to take place as part of the Ironmongers' Trust Company grant we received. This is also paying for a new lever pivot casting to be made: both a pattern and the casting itself, in order to replace the one that has been lost at some stage. Many thanks are due to our excellent foundry in Keighley - Leach and Thompson. Robert, Jude and the team have been able to deal with some interesting challenges and have supported us greatly with great advice. Close up showing the cracks in the stanchion that requires a welded repair Matt with the stanchion on a sack Barrow, ready to load into my poor car for transport! Separately, a pattern has been made by Wilson Patterns of Cross Hills (many thanks to Jon for all his excellent work to...

The Type Of Bench You Can't Really Sit On..

Image
Over the last few visits, we've been installing the bench tops, onto which we can mount cranks, compensators and ground frames. Making use of the bench after bolting it all together Previously we had recovered and planted the concrete legs, paying particular attention to their alignment and levelling, as well as their position. The tops require bolting to these legs, which requires us to drill through the wood in the correct place, so that we can pick up the pre-cast holes in the concrete. Work underway on the bench To achieve this, we first place the timber (good, reclaimed hardwood sleepers) into position on the legs. We then mark from underneath using a stick dipped in paint. We then turn the timber over and drill through. This enables the holes to end up in the right place where they meet the concrete at least. Whilst we carefully eye up the verticality of the drill whilst drilling, this isn't quite as accurate as we would like, were we to have been drilling from above! We ...

The Rafters – Part 2

Image
Construction has begun once again on the signal box as the hand-carved decoration on the ends of the purlins has been completed allowing us to set them in position on the gable ends and begin cutting and fitting the rafters to the rear section of the roof. I think I mentioned previously that these rafters would require more than a little ‘fiddling’ to get a good fit and so it has proved. This has been compounded by the fact that the ridge timber, after a few weeks exposure to the Cumbrian sun and rain, has developed a marked twist at one end (please see the photo) which we will also now have to accommodate. Despite these irritations, we have now managed a satisfactory fit of a rafter at each end of the ridge leaving another nine required to fill the gap. I will keep you posted.

Central Division Lever Frame Progress

Image
The frame for use in the S&D box is one built by I'Ansons / the NER (we're still unsure exactly who did / designed what, but it would be fair to say it was a joint effort), was originally in use at Pesspool and comprises of 22 levers. The quadrants laid out as they will sit in the box, with the big lumps beside which are the pivot supports Pretty much the signaller's view All the bolts have now been removed from the pivot support castings (these sit low down, and link between the stanchions) and the lever quadrants (which you see at floor level in the box). Whilst we will require an additional 17 (I think...) bolts for the quadrants, all the rest will require cleaning and treating, but can then be reused. The pivot support bolts are all reusable too. Jim, on his return, gets to grips undoing the bolts which we have now popped into safe storage You may remember that Mr Ferrari took some of the quadrants away for cleaning and painting with the children: we now have all th...

The Gable Ends – Part 1

Image
Why, all those years ago, those constructing our signalbox decided to build three-quarters of it in random sandstone and then finish it in cream bricks, we will never know. However, true to our objectives to replicate the original, we will do the same and, with our time capsule embedded firmly in the last course of stone, the first few courses of bricks that will comprise the gable ends of the ‘box were laid. Attempts to obtain old bricks of a suitable age and colour locally met with no success, so a brickworks was commissioned to produce and age them accordingly with truly outstanding results that will enable us to build something that does look years old. As the gables rise towards their peak, we will build in the two sturdy purlins (roof supports) with the ridge beam siting on the peak itself. Watch this space!

The Fireplace

Image
The small fireplace with the skewed chimney stack that we always knew existed in the signalbox, but not its exact size or design, has now been completed after much debate, numerous rejections and several failures. Viewing the completed structure, you could be forgiven for thinking that it was much ado about nothing! After all, just how much work can building a small, plain, brick fireplace consist of? Well, let me tell you, there was absolutely no room to work with as the footprint of the fireplace was determined entirely by the small, supporting arch underneath (regular readers will remember from earlier blogs that this itself was in a terrible state prior to our comprehensive repair of it). It was on this that we had to fit the complete fireplace and flue, the dimensions of which are important for a proper draught. The original flue was intended to be contained within the 18 thick rear wall, except we discovered at the last minute that the rear wall was 18 thick at one end but, at th...