Posts

Showing posts from August, 2024

Ash, Slag, Clinker, Bricks, Wire and all sorts:

Image
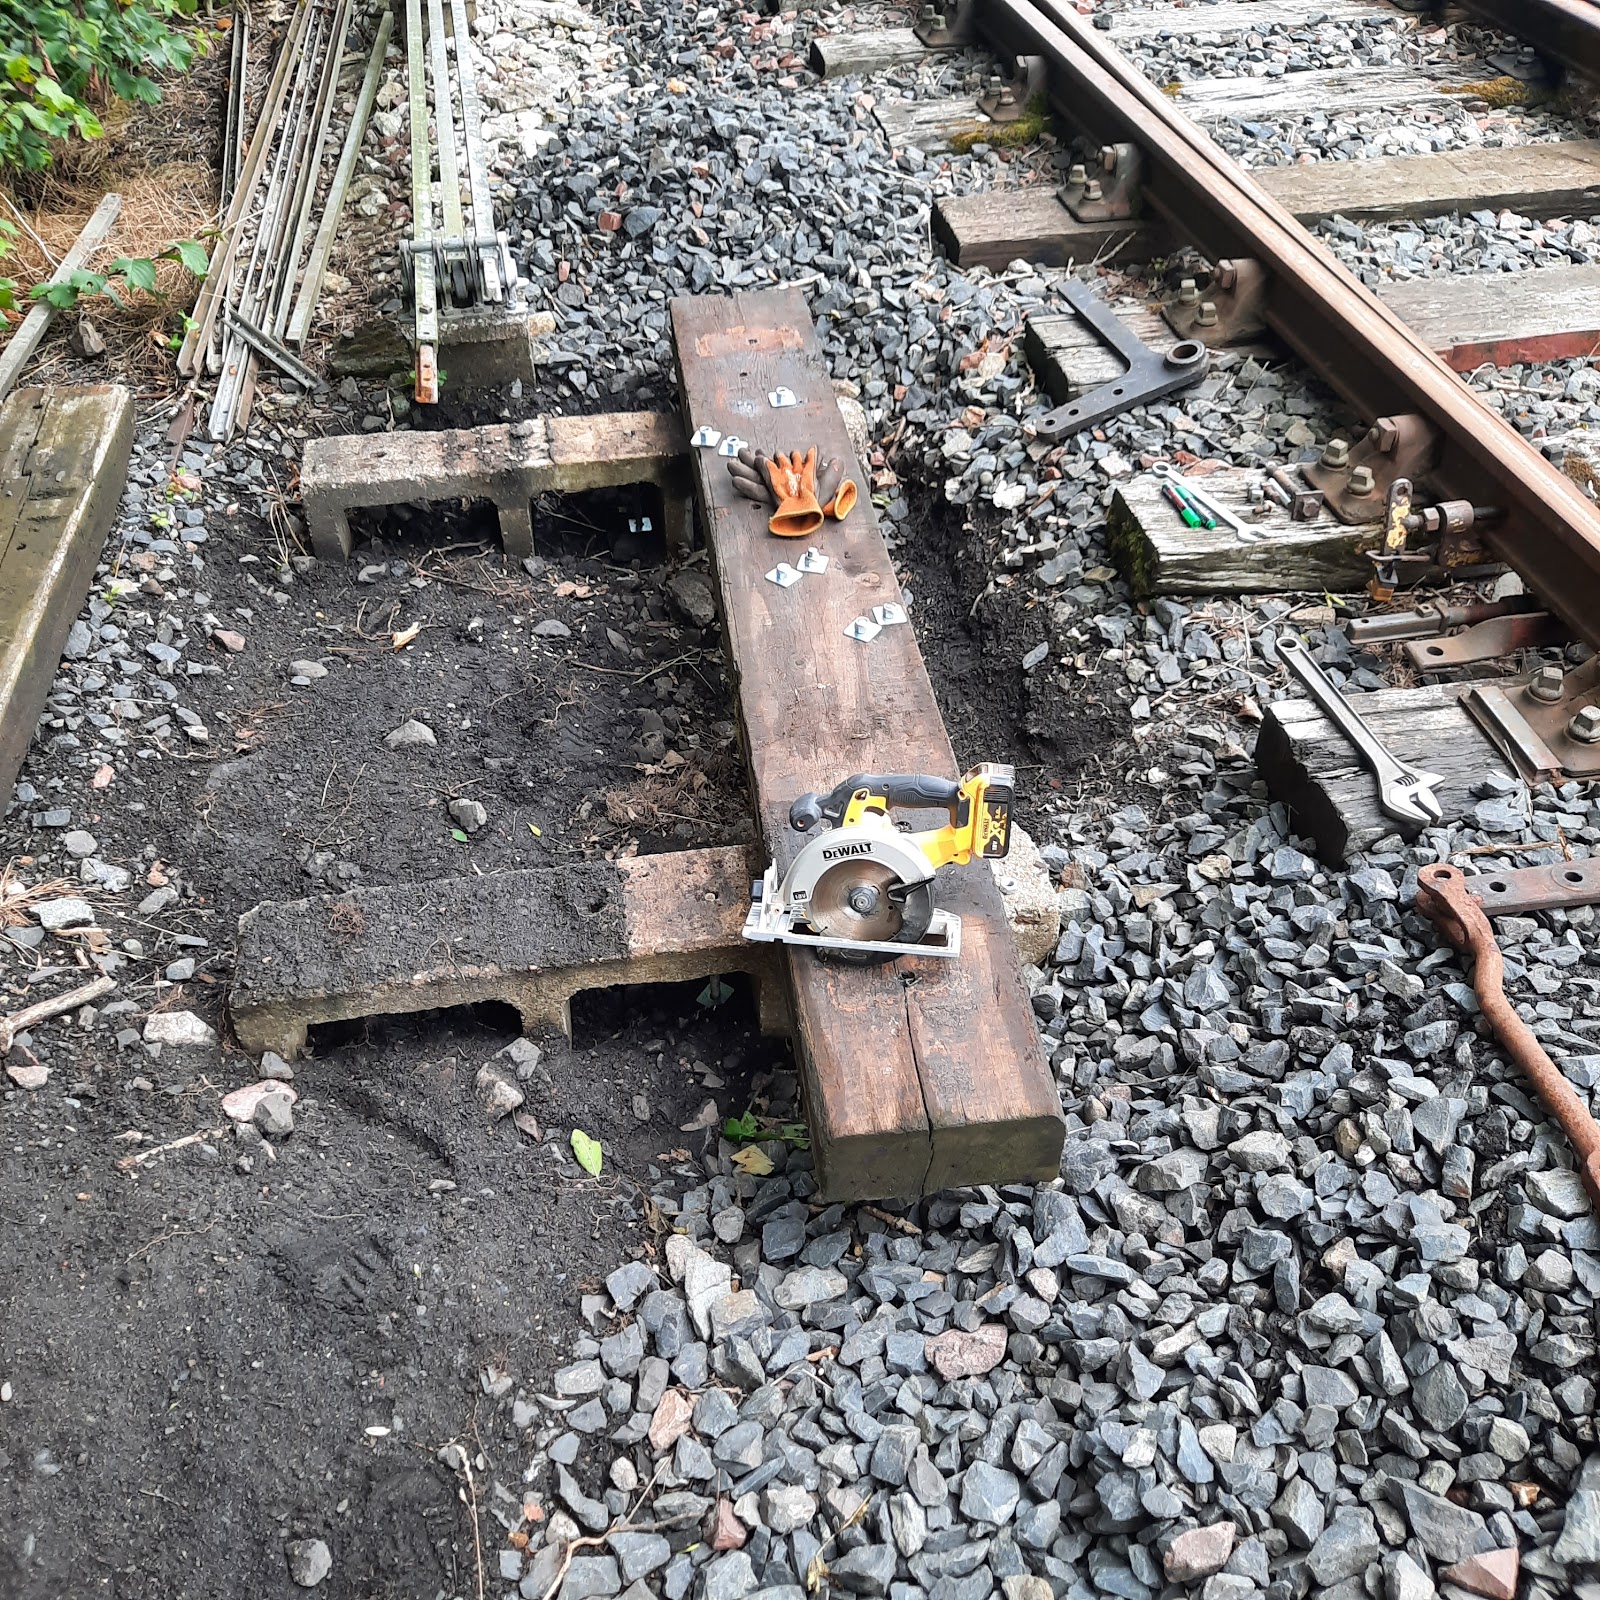
  ...The Things You Find When Digging Holes! Whilst Matt has been concentrating on the signal wire stakes (see other posts), we've also been trying to work our exactly where to place the wooden benches that will carry the flat wheels. These take the signal wires through (approximately) 90° to route underneath the track; from the wire run to the signals themselves. The first such bench we chose to make needs to take 9 wires, and is one of the more awkward to position. Why so many wires? Well, that's a story for another day, although we have alluded to dual control of certain signals between the West (S&D) box and the Junction box... Having determined the location (driven by the signal locations, sleeper spacings and consideration of walking routes and future projects), we roughed out a bench top, using some seized flat wheels to look at alignments. This determined the length and width of the bench we needed, and allowed us to cut the timber. We opted to drill right through,

Asleep on the Job?

Image
 You may be forgiven for thinking we were asleep on the job as it is a while since the last blog on the signal box, but the truth of the matter is that the rear wall has taken up massive amounts of time, resources and materials to repair and complete.  However, the good news is that it is now finished with the hollow core filled with grout, all the missing stones replaced and built up to encapsulate the rafters with the top capped off to prevent the ingress of any weather or wildlife. Also, the final two rafters have now been fitted and, as you can see in the photo, our master craftsman, ‘Delboy’, has been fitting the outrigger supports and the complete assembly will form the roof overhang at each end of the building. When these details are complete, we will begin boarding the roof with T&G, then continue on to fit the slates and the host of minutiae required to finish the building and make it watertight. Stand by for the next exciting instalment!

More Holes Than A Slice Of Swiss Cheese...

Image
A little while ago, we were trying to install a bench top to take two compensators, and discovered it needed to be lower to avoid conflicts between the rodding connections. We chose an old soleplate that would normally be used on a set of points. This being steel, we required a mag drill in order to bolt the whole assembly together. In the meantime, however, we cleaned up and painted the soleplate. Many thanks to Rob for allowing us to use his mag drill: we carefully marked out where all the holes needed to be drilled and set to! Will 'flew' the drill and has then taken time to clean off the oil and give the soleplate another coat of paint. Hopefully we can get it installed on the next visit! There is one more obstacle to overcome, however... One of the compensators is positioned in such a way that it sits directly on top of the securing bolt... we will look to weld a stud here instead. The perils of confined spaces!! In an ideal world, the bench leg would have been slightly (8

Cleaning and Painting

Image
For this project, there are lots of metal components which require cleaning up and painting. This is an activity that is particularly satisfying, and which several volunteers are carrying out, as and when they have a few minutes spare. All the equipment and paint is to hand, so it is a nice job to fall back on. This task also expands to cover the dismantling of seized components before they can be cleaned up and painted. There are lots of items  in all sorts of states! Will dismantling a clip (adjustable) crank into its component parts A selection of photos below gives some indication of what is involved, as well as the quantity required! Many thanks to all those who are putting in the hard work, particularly David, Jim and Will. Components before a healthy dose of red oxide A couple of compensators in their component pieces

Benches II - Sitting Around Idly?

Image
Following on from the previous instalment on benches, we had a discrepancy in height to tackle on the first bench along from the Junction ground frame. This was due to the bench top being a thicker sleeper than we had anticipated. Fortunately, we were only 1" out, so it was a quick case of marking up where the concrete legs touched the timber (allowing a bit of leeway), then flipping the timber over to cut out enough to allow the whole lot to sit lower. The alternative would have been to dig out the legs completely, then dig out even more underneath, before levelling them up again. We didn't fancy that in the slightest!! A battery circular saw was used to make multiple cuts across the timber, before the hammer and chisel were deployed to chisel out the excess timber. Once both sides were suitably rebated, the timber was flipped back over, levels checked and attempts made to push the threaded bar back through the holes. This was a bit fiddly, but accomplished the moment additio

Putting Up Shelves

Image
Putting up shelves normally requires some means of supporting them. Usually a bracket! In the case of the signal box, there is a shelf for all the instruments to sit upon, which is located above the lever frame itself! The brackets for this, that partner the CD frame, are fairly ornate and quite distinctive. Whilst we have brackets to support the lever descriptions that go behind the frame, low down, we do not have any original block shelf brackets. Brackets at Beamish A visit to Beamish (unrelated to the work at KSE...) resulted in 'spotting' three such brackets on the wall of a non-railway display! Subsequent discussions with Paul Jarman saw the loan of one of these brackets being agreed so that we could cast copies from it. For the signal box, we will require two such brackets, and having an original to work from was a much more appealing proposition than having to recreate them from scratch.  The loaned Bracket Discussions with the foundry ('our' excellent Leach &am

Stake and Chips

Image
 ...no, not that kind of steak... nor the type used to dispatch vampires (although they are a similar shape)! A pile of recovered stakes In order to operate the semaphore signals from the box, wires are connected to the levers and run along to the signals by means of flat wheels (to change direction) and pulleys (held on posts) to travel the distance. It is these posts we are (well, primarily Matt is) installing. We recovered a large number of concrete wire stakes from Norfolk as part of a joint exercise in cooperation with various parties. Some of these had wire pulleys (or the remains of those) still attached. Timmy supervises the installation of the stake (whilst keeping well away from Barras) Having decided the principal routing for the signal wire runs, these stakes have been spaced along the run to support the wires for the signals. It is then a case of digging out holes in the ground to plant them in. It would be far easier to just stab them into the terrain (as the name suggest

Going Potty!

Image
Last Tuesday saw the final bricks laid to complete the chimney stack of the signal box – I thought we would never get there, but we still need a pot. Those that we have are out of proportion with the stack, so we need a round terracotta pot approx. 24" high and approx. 10" outside diameter at the base in the style seen in the photograph below. If anyone has, or knows of one not in use, we would very much like to hear from you with a view to acquiring it. Moving on to the rear wall that has not been worked on for some months, we have brought the inside face up to ceiling height and are now busy building the sandstone outer face up to its final height. In addition, as you can see, some of the rafters have delighted in acquiring monumental twist since they were installed – something else to sort out!

Shopping and Housework

Image
 ... both necessary evils! We recently came across a quantity of signalling materials for sale at Barrow Hill which looked rather useful towards both this project and the next phase(s)! A visit to inspect what exactly was available, and to discuss payment, resulted in a day trip with a large transit van a couple of months later to collect the bits we had earmarked. This was funded by our volunteers putting their hands into their pockets: our Lottery funding does not cover everything required for the project, and we are always looking for additional donations towards it to help make up the shortfall!  Some of the materials at Barrow Hill Many thanks to Mervyn and his team at Barrow Hill: it was great to have a look around and see all the work they have been doing and how much they have achieved! Cooperation with both the Ffestiniog and Corris Railways tied in to this, and I suspect there will be more swaps to ensure everyone gets what they need!  A heap of items requiring sorting out, d