Posts

Showing posts with the label Chimney

Well Fed Moles Dig Better Hole
Image
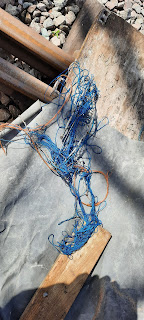
With works around the outside of the signalbox largely completed, this Mole turned his attention towards the missing section of the rodding run. There are only 4 stools required here, so thankfully it wasn't too daunting. However, the terrain was 'challenging'! First up, stools were selected and moved close to the run, with exact locations (at 9' intervals) marked out. The next job was to scrape back the ballast, concrete remnants and anything else that sat on top of the membrane. This then required cutting to enable the holes to be dug, and the stools planted. The end two holes were dug first, with great care being taken to get the stools in exactly the right place. Measurements were made from the inner edge of the rail for these, and the tops set at the same height as the top of the sleepers. Our tape measure (named John) came into its own here. These stools were tightly packed in place, the membrane folded back around them, and then ballast packed on top to leave bot...

Frame installation: Day 3

Image
The third day dawned with delays in getting up to Kirkby Stephen, but work kicked off rapidly, with the aim of fixing all the quadrants down properly, getting the steadying brackets attached to both the frame and the joists as well as tidying up everything else and triple checking what we'd already done. We had several holes that hadn't centred properly, so we marked out what needed to be removed, took off the quadrants affected, and set up the mag drill to correct the errors. None was greater than 1/8", and most just took a minute or two with a file. Quadrants lifted off to allow the mag drill to sit on the longitudinal tie bar. The steadying brackets attach to the underside of the stanchions and tie these to the joists. This steadies the frame and also supports the remaining sections of floor, which also have to be able to be lifted out, to allow access to the locking. This will be another job for the near future. For now, we have installed a temporary floor to allow saf...

Frame installation: Day 2

Image
The second day of the frame installation saw the primary focus being on bolting the frame down to the girders, so as to ensure nothing could be pushed out of alignment with the rest of our work above. The mag drill in position to drill the mounting holes for the stanchion. A great deal of eyeing up, measuring and double checking followed, to ensure the frame WAS, in fact, in the correct position. We then marked round the foot of each stanchion, as well as drawing through the mounting holes to give the location of the hole. The marking out is obvious, as is the lack of clearance for drilling... Sadly, the shape of the stanchions, depth of the holes etc precluded the use of the mag drill directly through the holes... So, once everything was marked up (and double-checked), we once again jacked the frame down to one end of the box, along the girders, to allow the mag drill to be positioned, ready to drill the holes we required. Because of the clearances, we could only drill half the holes ...

More Ground Signals... 2 in 1!

Image
The previous post featured an LNER-pattern ground signal: this is an LMS-pattern variant. As mentioned quite a while ago, this is very in-keeping for Kirkby Stephen, as they were used here from the 1950s. The LNER-pattern are upper quadrant, as opposed to the lower quadrant LMS...  This signal (above) will control movements into the Bay platform or the Tebay platform, from the point ends, to allow greater flexibility with shunting. Standard convention dictates the uppermost disc refers to the left-hand-most route, therefore the top is for the Bay, and the bottom for the Tebay platform. This was another bench building, mole-digging type of affair. They're quite common throughout this part of the project!! Between Dave, Alex, Steve and I, the ground signal was planted and bolted down at one corner, just in time for the Open Weekend, complete with temporary discs attached. We will be getting a batch of new discs made a little later. This just left the rest of the bolting down to be co...

A Determined Effort

Image
Over the past week, we’ve made some incredible progress with the roof slating. The north face is now watertight, and we’re about halfway up the south face. As I mentioned in the last post, we’re pushing through regardless of the weather, and it’s paying off. A few nice days have also helped, and the progress is very pleasing. We’re using reclaimed Welsh slate, which varies in thickness and size, making it a bit challenging to achieve the professional finish we’re aiming for. However, with patience (and a few hiccups along the way), we’re very happy with the results so far. When we reach the top of the roof, I'll be sure to let you know.

The Grand Finale

Image
Saturday morning and Toby delivered the long-awaited chimney pot that he had sourced, and generously donated, to the signalbox project. So, while the sun shone today, without further ado, we cemented it into its rightful place atop the stack – hopefully to survey the landscape for many years to come. That done, we turned our attention back to fitting the battening and under sarking on the roof and managed to complete the north side before finishing for the day.  Just a little bit closer to a watertight building – keep watching!